Showing posts with label cakes. Show all posts

Space Cake

This was a really fun project!  I spent quite a bit of time on it and took pictures of some of my trial & error of the planets.  The cake itself was pretty straightforward.  The birthday boy (not my son; a friend's son) wanted chocolate (and, he wanted the cake to be space-themed).  So, since the cake was supposed to feed a crowd of 50-60 people, I used five Devil's Food cake mixes.

One standard cake mix fits perfectly into a half-sheet pan, so I baked four of those and the fifth cake mix was for the sun.  The final product was quite heavy: about 22 pounds.  It needed a strong base; so I cut up a large cardboard box and hot-glued three layers of regular corrugated cardboard together (and then hotglued foil over the whole thing).  Three layers thick of cardboard ended being just right for this cake.

Most of my cake layers didn't break when I transferred them, but of course the one I took pictures of was the broken one :)  Since I think it helps cakes to be moist, I usually bake-ahead-and-freeze them, but there wasn't room in my freezer for these.  So, to ensure that they were nice and moist I brushed each layer with a simple syrup: just water & sugar brought to a boil, and I added a little vanilla to it before brushing it on.

Following the simple syrup I covered each layer with a full can of store-bought vanilla frosting.
I used canned frosting between each layer, but I made my own buttercream to cover the entire cake (four layers) in a thick crumb coat.  I used part butter and part shortening for a nice flavor and consistency.  After the frosting had had a chance to dry out & set up, I patted it nice and smooth all over with a paper towel so that it would be a smooth finish for the ganache, later.
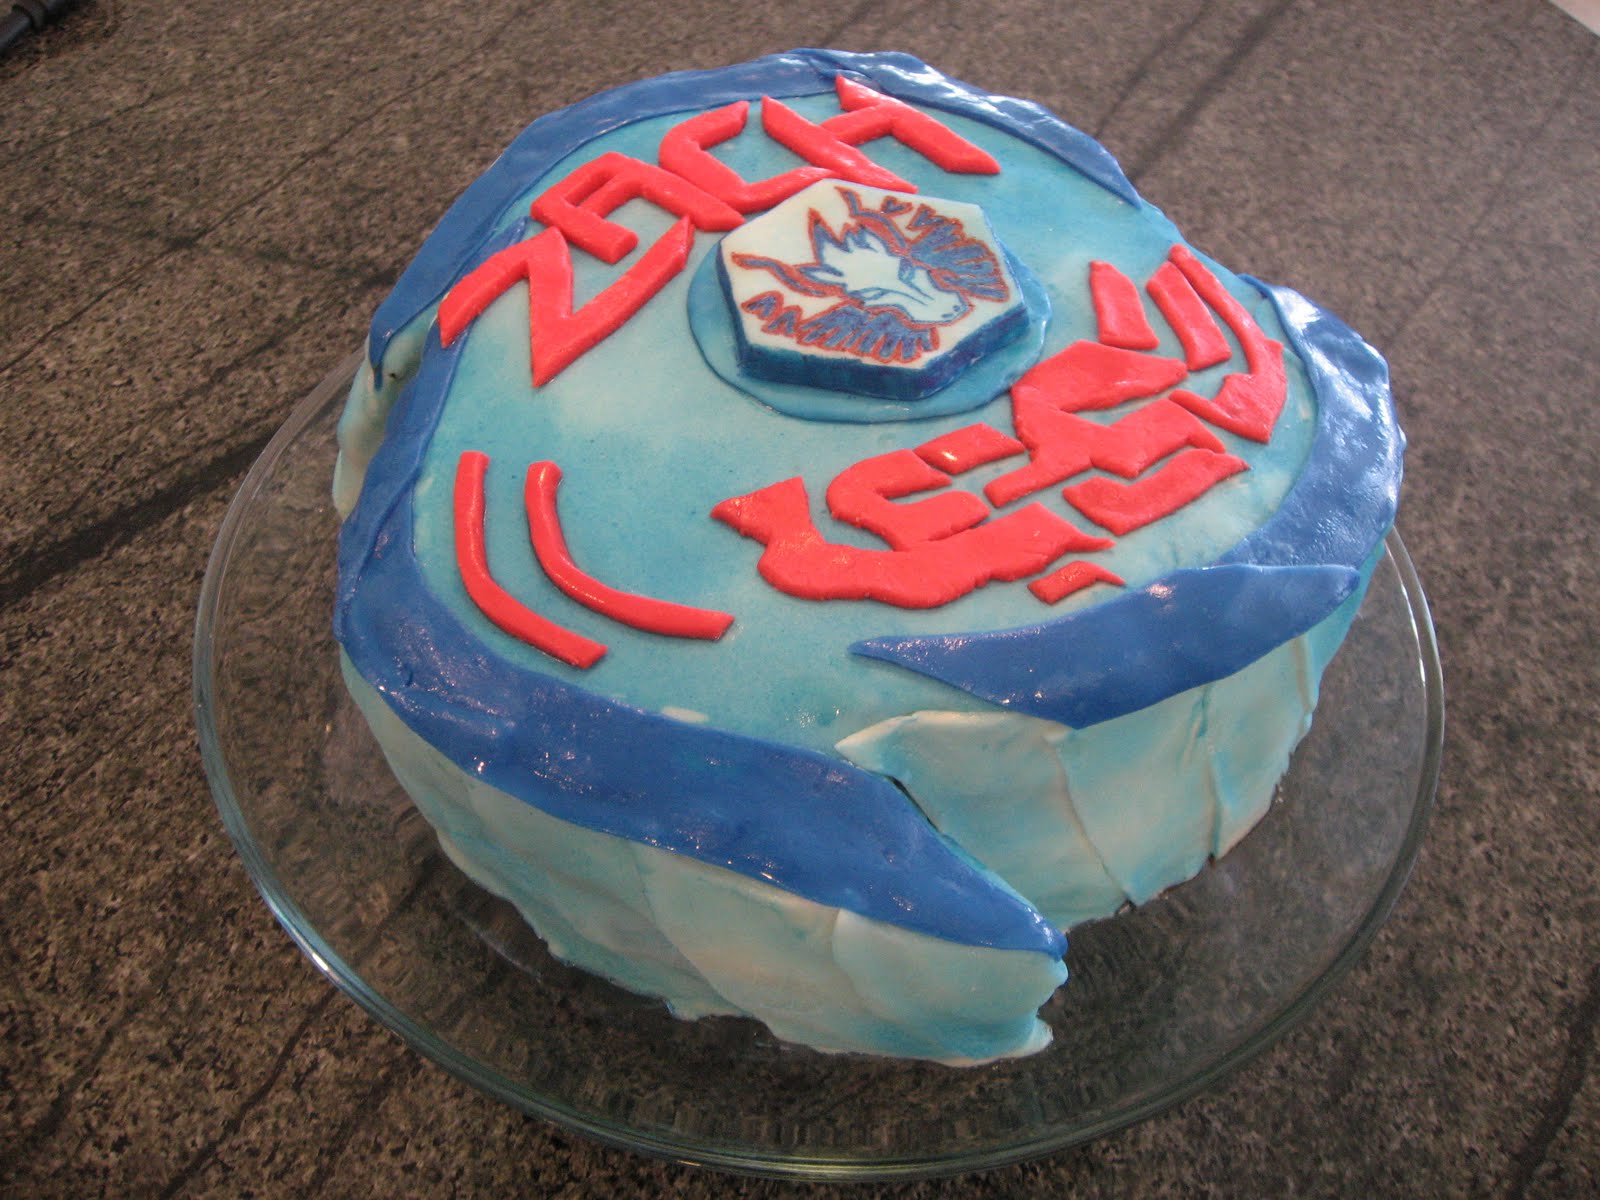
Once the cake was coated (the whole thing; I just hadn't finished the sides when I snapped the photo above), it was time to figure out how to make the planets.  I looked online for ideas but ultimately only had success with lots of my own trial and error.  I'd planned on making the smaller planets out of balls of rolled fondant, but for the bigger ones (Jupiter & Saturn) I wanted them to be hollow so that they'd be light enough to stand up on a sucker stick above the surface of the cake.

So... how would you make hollow, edible planets???

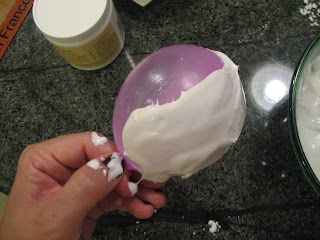
I mixed up a batch of royal icing and tried covering a greased balloon with it, with the idea that I could let it harden and then pop the balloon.  Well, this was a small, thin, flimsy water balloon and it popped under the weight of the royal icing just a few seconds after I took this picture.  Maybe a more sturdy balloon would've worked.  But I just gave up on that idea.
Then I thought, I'll make two half-spheres and stick them together.  I decided that a tennis ball was a good size, so I made a half-sphere mold out with a tennis ball and greased foil.
 And, I tried the "inverted" version.  Neither of these worked.  Even letting them harden overnight, and doing several of them with different thicknesses of royal icing, either they didn't harden completely, or they were too crumbly and delicate.
 So how about melted sugar?  The standard recipe for homemade hard candy is 2 parts granulated sugar to 1 part light corn syrup, cooked until hard crack temperature.  First I tried using the inverted (bowl-shaped) foil molds, and drizzling melted sugar back & forth to create sort of a nest.  I've seen this done on TV so I thought it would work :)  Well, it wasn't a bad idea but the results all broke -- too delicate.  And, definitely too delicate to cover with fondant, as was my plan.
Then I tried covering the tennis ball with waxed paper and spooning a thicker layer of sugar onto it.  The results were better: a sturdier half-sphere, BUT the waxed paper stuck to it (which meant it would not be 100% edible).
 Finally!  The solution!!  Greased foil wrapped around a tennis ball: I spooned the melted sugar (which was over-cooked by this time, hence the amber color) over the greased foil, and after it hardened (which only took a couple minutes) it was easy to squeeze the tennis ball out of there.  And, the foil peeled off quite nicely.  Hooray!!  The sugar was thicker so it would be strong enough, so it was heavier than I really wanted but it was nice and sturdy.  In the background of this picture below you can see Saturn's ring, which I made by drawing a circle onto a piece of paper and putting it underneath my Silpat, then spooning melted sugar onto the Silpat using the circle as a guide, and then quickly running a toothpick that had been dipped in food coloring through it to give it a marbled color.
Using more melted sugar I glued two halves together to make a circle, and for Saturn I adhered toothpicks (with more melted sugar to make them nice and strong) on either side to later support its ring (after I covered Saturn with fondant, I glued the ring to the toothpicks using - you guessed it - melted sugar).

 For the smaller planets, I'd planned to make balls of fondant, but my fondant was too fresh and not firm enough to hold a good shape.  So, I used suckers for the form and covered them with fondant.  The smallest planets (Mercury & Pluto) were dum dums, and the medium-sized planets were Tootsie-Pops.  Once I covered them in fondant I stuck their sticks into a piece of floral foam so their surface could dry out a little before I painted them.

Painting them was the most fun part of the whole thing!  I decided this method would be easier to get the colors I wanted, rather than mixing up several colors of fondant.  I used mostly food coloring gels, thinned out with a little water.
 I made the sun the same way as when I made Noah's basketball cake, a few years ago: baked 3 small rounds, stacked them, and had my husband carve them into a half-sphere for me.  I didn't take any pictures of the creation of the sun, but it's just chocolate cake with vanilla frosting between the layers, crumb coated all over, and I put it in the fridge to firm it up for a while before it was time to put it on the cake.

Oh, and as you can see, the cake is covered all over with chocolate ganache (chocolate+cream).  I wanted the backdrop to be dark, without having to make something like black fondant.  Ick.  This was much better and I think it was dark enough for the "space" effect.  A little ganache goes a long way, as it's quite runny (I made WAY too much of it) -- but I knew it would be viscous enough to flawlessly cover the white frosting underneath it.

Once the ganache was on and had firmed up a bit, I put the sun on, and frosted it with yellow buttercream that I'd made to a pretty thick consistency so that I'd be able to make it all spiky-looking.  I added some dabs of orange food coloring gel to try to make it look more sunny.

Since most of the planets were on suckers and therefore already on sucker sticks, I hot-glued longer sucker sticks to the ones that I wanted to stand up higher.  Jupiter & Saturn proved too heavy to be more than barely above the surface.  I rolled out some yellow fondant for the stars and painted the letters on them with food coloring gel.
 This was a really fun cake and it turned out pretty similar to the sketch I'd drawn out ahead of time.  I heard that the birthday boy loved it (I wasn't able to be there to see his reaction) and I heard that it tasted good, too :)


Pen Pal!

I love to get "reader emails" although that is a rare event. Well, back in early December I received an email from a reader in Malaysia, named Deepa. How fun! She had been researching spiral cakes and came across this post, my nephew Crew's 2nd birthday Cars cake. The existing instructions on carving the spiral weren't clear (and it didn't help that I hadn't taken any pictures during the carving process) so I prepared this little diagram and emailed it back to her:


About a week later she sent me pictures of the cake she made for her godson. Just look at how CUTE that turned out! Her work is SO good and clean and she even made the cars out of fondant! She told me that she had only covered plain round cakes with fondant twice before she'd made this one. She's a natural with fondant!

We exchanged many more emails over the course of several weeks; she shared with me her recipe for from-scratch cake that she uses that is strong enough to support the weight of fondant, and I learned that cake mixes are very expensive in Malaysia because they're imported, so nobody uses them. Deepa sounds lovely and is a young mother of 3 who finds cake decorating to be therapeutic. I understand that completely!


I had such fun writing back and forth with a new friend; I know the internet has been around for a long time now but I still marvel at how it seems to make the world so much smaller.

Zoe & Lucy's 8th birthday cakes

Zoe and Lucy had their birthday party at a fun party place (Amazing Jake's) so there really wasn't a "theme" for me to go by for the cake. The night before, I laid in bed thinking about it and this is roughly what I came up with; I wanted them to be brightly colored and reflect a "fun" mood just like their party would be.


I made plenty of this fondant and colored it in several colors; the bottom layer of the cakes are 8", then 6", then the top little cakes I baked in my 5" rounds but trimmed them down to about 3 1/2". It had been a while since I covered a cake in fondant and it was a lot of fun to make these.

A great Piping idea!

How many of you hate to clean out your frosting bags when you're done with a project? Or even worse is having to refill them with frosting mid-project and have a goopy mess on your hands? Well I learned a new trick last week from my mom that makes life SO much easier when you're piping!


First lay out a square of plastic wrap, and put a blob of icing in the middle of it (this was pretty runny icing that I was using for sugar cookies). Next, fold one side of the plastic over the icing and roll it up like a tootsie roll. Snip off the extra plastic on one end with scissors, and twist the other end. Prepare your frosting bag as you normally would (coupler, tip, etc) and then just put your plastic-wrapped icing right in! Put the cut side in and the twisted side out, and then just twist and squeeze your frosting bag as usual. If your icing runs out before the job is done; no problem! Just remove the whole plastic tootsie roll thing from your frosting bag and make a new one. Your frosting bag stays totally clean except for the the very tip, and it's so much easier to deal with.


Thanks for the great tip, Mom!

Pencil Cake

The first day of school is tomorrow, and we celebrated today with a big fun swim party for all the cousins at my parents' house. My mom asked me to make a pencil cake for the occasion; how fun! She found a couple of ideas online. I followed these instructions, and when you're starting with frozen Sara Lee pound cake it really couldn't have been easier! The pencil cake in the photos looks SO much nicer than mine; oh well.

A couple of notes: next time I would use a Hershey's Kiss for the tip, rather than melted/molded chocolate that turns out to be the same basic shape. Also, I used fondant for the greenish band joining eraser & pencil, since I had fondant on hand. After I'd put it on, I brushed the fondant with some iridescent powder to give it a little shimmer.

This was a fun little project and I would do it again!

Beyblade Cake

For a church fundraiser in June I auctioned off the service of making one custom birthday cake. The winner of the cake happened to be my across-the-street neighbor, and they "collected" on their winnings this weekend with their 9-yr-old son's birthday. At first (a month ago) I was told he wanted a football cake. But then a few days later he'd changed his mind, and wanted his party to be all about Beyblades. Well, I had NEVER heard of that! So I figured I'd better learn pretty quick!


Not being my own child's birthday cake, I wasn't as excited about this project as I usually am, but once I got into it, it was still a lot of fun to make. I made two 10" rounds (chocolate cake) and split them with chocolate frosting between each layer. FYI, one full cake mix fits perfectly into a 10" round. After the crumb coat I carved the "fins" to make it look a little more like the shape of a Beyblade (which is basically a fancy top). The thin parts weren't very sturdy but after another coat of frosting, and holding them steady with toothpicks in the fridge overnight, they ended up being okay with the weight of the fondant.


I used a couple of products for the first time with this cake: food color spray (like edible spraypaint; widely available) and edible markers. Both worked great! I covered the top first in white marshmallow fondant and then sprayed it blue. I also covered the sides (in angular strips) in white fondant and sprayed the sides blue, too. I used blue and red fondant for the accents -- my friend Danika had just made a Lego cake for her son and she brought her leftover, brightly-colored fondant for me to use and it was perfect for this!
For the red letters & design, I cut the shapes out of the red fondant and then let them dry out (laying on a Silpat mat so they wouldn't stick) for a few hours so that I could transfer them to the cake when they were more stiff not so pliable, so that they wouldn't lose their shape when transferred.

I drew this "Galaxy Pegasis" (Zach's favorite Beyblade) with the edible markers, which I bought at Michael's. I had cut this thick hexagon (using a paper template) from the white fondant, sprayed it lightly with the blue spray, and let it "dry" for a several hours before attempting to draw on it with the markers. The surface had firmed up some by then but I still had to be very careful not to apply too much pressure as it was still a bit squishy.


Here is what an actual Galaxy Pegasis Beyblade looks like; I printed this out as a guide and I also had borrowed the birthday boy's toy for reference. (Don't be too critical; I know it doesn't look much like it but I do think the Pegasis turned out pretty well.)
It was a fun challenge, and I'm excited to now have colored spray and food markers added to my repertoire of cake-making tools.


P.S. A couple of fondant tips: when you're ready to roll it out, sprinkle plenty of powdered sugar onto your counter and rolling pin. If it's still too sticky, knead more powdered sugar into it. This is for marshmallow fondant; it's been so long since I've used "regular" fondant that I don't recall whether it gets too sticky or not. Also, keep a cup of water with a small paintbrush handy (like a child's watercolor paintbrush). Brush water onto the back of pieces of fondant that you're going to stick on to the cake. Two layers of fondant with water between them will stick together permanently! Also, use the water to brush off any residual powdered sugar on the exposed surface. Or just brush some water on there to make it more shiny!


P.P.S. I still don't know much about Beyblades but FYI, they spell it "Pegasis," and not "Pegasus," as is the traditional winged-horse spelling.

Special Occasion Cupcakes

I bought a TON of cake mixes when they were on sale at the grocery store last month, so now whenever I'm tasked with bringing a dessert to a group function, I wonder what I can make that requires a cake mix in its preparation. For my piano recital this week I decided to make cupcakes, but a fancier-than-usual version. I found this recipe on allrecipes.com; and I topped them with a sour cream chocolate frosting that I adapted from another allrecipes.com recipe. The result was delicious.


Self-filled Cupcakes

1 chocolate or devil's food cake mix, plus ingredients to prepare it (eggs, oil, water)
8 oz cream cheese (1 brick), softened
1/2 c white sugar
1 egg
1 c semisweet chocolate chips

Prepare 24-30 cupcake tins with papers (I did 30); preheat oven as directed on cake mix instructions. Mix up cake mix ingredients according to box directions and set aside. In a smaller bowl, cream the cream cheese with the sugar. Then add egg and blend well. Stir in chocolate chips.

Fill each cupcake tin 1/2 full of chocolate batter, then top with about 1 T of the cream cheese mixture. You should still have some of the chocolate cake mix left; spoon a little bit on top of the cream cheese mixture on each cupcake. Don't stir it around or marble it; just allow the cream cheese mixture to stay in its own little glob.

Bake according to box directions.

They'll look something like this:
I didn't have quite enough chocolate batter to top each cupcake with an additional spoonful but I wish I had. The ones without it (like at the bottom left of the photo above) sunk down in the middle ~ which just had to be compensated for with extra frosting.


Sour Cream Chocolate Frosting

1 c semisweet chocolate chips
1/2 stick (4 T) butter
1 T cocoa (unsweetened powder)
1/4 tsp salt
2/3 c sour cream
2 T cream
1/2 tsp vanilla
about 4 c powdered sugar

In a medium-large microwave-proof bowl, melt the chocolate chips, butter, cocoa, and salt together. Heat in 15-20 second intervals, stirring in between. It only took about a minute total for my microwave to melt it completely. Allow this mixture to cool for about 15 minutes; then beat in the sour cream, cream, and vanilla. Beat in the powdered sugar about a cup at a time. Add more or less than 4 cups depending on desired thickness.

This frosting has a nice tang to it due to the sour cream, and it's just the right amount of chocolatey-ness. It was plenty for frosting my 30 cupcakes. This frosting would also be great on a sheet cake or brownies.
Each cupcake had a moist, yummy surprise with the cream cheese and chocolate chips inside! I will definitely make these again sometime.


Next time, I'll be better prepared with some pretty cupcake baking papers. Like these. Are those the cutest or what!

Tangled Cake

For my daughter Molly's 9th birthday, she requested a Tangled cake. What a fun assignment! After looking at few ideas online, I decided to make a tower.

I baked four 5" rounds, and two 6" rounds. And, I figured out that one standard cake mix fits well in two 5"'s and one 6" -- so I did that twice. I used devils food cake mix following these instructions. I baked them in advance and froze them, and when assembling I cut the dome off each cake, and split it, and put white frosting (store-bought) between each layer.


I put one full 6" cake on the bottom, then three of the 5" cakes stacked on top of it. I used 12" dowels for support (later I would learn that they needed to be trimmed to about 10"). It looks like I stacked them a little crooked; well it turned out okay. For the top of the tower, I put a 5" on top of a 6" (split with frosting first) and carved it into the turret shape. I did this on a separate plate, and once it was carved I added it to the top of the tower. **In hindsight, I wish I had added the turret AFTER the rest of the tower was decorated... it would've been easier to work on them independently.** One it was all stacked and straight-ish looking, I took a sharp knife to it and carved the tower to be slightly more narrow, with a bit of a flare at the bottom. Then I gave it a generous crumb-coat. I used two cans of vanilla frosting; one for between all the layers, and an entire second can for the crumb coat. I knew I'd be covering it with plenty of fondant (click for step-by-step marshmallow fondant tutorial!) so I knew those unsightly crumbs would be hidden. Then, the cake sat in the fridge for a while, while I did some fondant work. Marshmallow rolled fondant is fabulous for covering cakes; it's not so good for molding. This batch seemed to be particularly "runny" (I think I added too much water) so when making the shingles, flowers, leaves, and of course Rapunzel herself, I formed the pieces and let them sit out to dry for a couple of hours before using them.

For the shingles, I used two different shades of a purple/brown/gray combination to give them a more "realistic" look. To make them I just rolled out several pieces of the fondant, and cut them into rectangles with a pizza cutter (then let them dry out). It took quite a while to place them individually on the turret but it was a good activity to do while watching TV :) To make them stick, I used regular frosting for the bottom layer of shingles, and for each layer above that I just brushed a little water on the back of each shingle. Water makes fondant stick to fondant -- very strong.The challenge with sculpting Rapunzel was the mushy-fondant issue. I had to do her in stages, allowing her to sit out and harden in between. She had a toothpick through the middle of her for stability. I cut the window opening after I'd covered the tower in fondant; I just used a shape knife and then I scraped out the cake with a fork. In order for the window's "background" to look better (not just crumbly cake & frosting), I covered the inside of the window space with dark chocolate frosting.


All of my kids commented on Rapunzel's bosom. She looked better the night before (I made this cake the night before we ate it & celebrated Molly's birthday)... her neck was longer and she was generally less squished in there. The window arch was higher too. But after spending the night in the fridge with the weight of a huge turret coming down on her head, she collapsed a little... causing her to become a bit more "bosomy." Oh, and for her eyes and mouth I just used a small-ended fondant tool, dipped in a little food coloring gel. I practice on a spare piece of fondant since I knew I'd only have one shot at it! The eyes & mouth were about the last thing I did. The only non-fondant used (visibly) in the decorating of this cake was the yellow centers of the flowers, and the green buttercream along the bottom. The vines, leaves, and red flowers were all fondant. I had two firsts with this cake: I used my fondant-shaping tools, which I'd had for years and not really ever used... they were GREAT for adding texture to Rapunzel's hair, sculpting her face and body, forming the flowers and leaves, etc. The other first was the use of Pearl Dust. It is available in several colors but I just bought white, to be generic. Using a small paint brush I dusted Rapunzel and her hair, the flowers nearest to her, and some of the shingles to give the roof a little shimmer. It was a nice touch. Plus, according to the movie Tangled, Rapunzel's hair is magical so I figured it had better shimmer!


Comparing the during-construction pictures with the finished-product pictures, what do you see? The cake shrunk! This always happens to me; I don't know if it's just the weight of the fondant, or if my cakes are to spongy to hold up, or what. Hm. I think next time I'll make a non-fondant cake and we'll see if, after 24 hours, it can hold up without collapsing. If any of you more-experience bakers out there have any suggestions, please let me know. I still like the way this cake turned out, but the original idea in my head was a taller tower, more like the height this one was before gravity took over!

Crew's Cake - Spiral Cake Tutorial

UPDATE: I received a nice email this morning from a reader in Malaysia (Hi, Deepa!) asking for more advice/help on how to carve the spiral. Unfortunately when I made this cake I didn't take any pictures of the carving process, darn! So, I took my little circles diagram below and made some notations on it about how we went about carving the spiral and I emailed that image back to Deepa. Meanwhile I thought I'd include it on this original post too in case anybody else might benefit from it. Happy cake-making!


My extended family got together for my nephew's 2nd birthday this weekend. My sister asked if I would like to make the cake instead of buying present, and of course I said yes! The theme was Cars (the movie) so I looked online for some ideas. When I found pictures of a Cars-themed spiral cake (like this, but much bigger and fancier) I knew I had to give it a try! As always, this cake took quite a while but I did as much ahead of time as I could: baked the cakes and froze them, and made & colored fondant and buttercream to help the decorating go faster the day of the party. The decorating was a lot of fun! Above you can see that my fondant mountains got saggy after it had sat for a while; most likely because each cake layer underneath was split into 3 layers with pudding in between. Everything was edible except for the three cars, and the sign on top. The blue sky is buttercream, along with the cacti, clouds, & piping detail. The road, road strips, Route 66 sign, rocks, mountains, and traffic light are fondant. Everyone loved the rocks; they were the easiest thing to make! I had made gray and tan fondant; to make each rock I just took a little bit each of gray & tan, and smushed/rolled them together and into a rock shape, and gave each rock a little texture from a frosting tip, a knife, or whatever was handy.

To figure out ahead of time how to successfully make the spiral while cutting off (wasting) as little cake as possible, Aaron & I stacked up the 3 cake pans I used: a 10", 8", and 6" round. We figured out that by stacking the cakes as shown below, the shape lent itself to a natural spiral. So, looking at my lovely diagram below, you can compare to the pictures above and see that the start of the road, where the Route 66 sign is, is just barely to the left of the bottom of the circles.
I used one cake mix for the 10" and split a second cake mix between the 8" & 6". I froze them overnight. The next morning I let them thaw a little and then assembled them: leveled the tops, split each cake into 3 layers, "dammed" the edges of each with a piping of thick frosting & filled layers with pudding, opted to do each cake upsidedown for the nice straight edges, stacked them all as shown in the diagram above, and returned the whole thing to the freezer for a couple hours to firm up before carving.


If you click to enlarge the diagram below it may help with carving your spiral cake. You can see how we stacked the 3 cakes, and the arrows show the way the road curved around all the way up to the top! Next time I'll take pictures of the carving process!

Aaron, who is much more artistic than I and a capable sculptor (he does all the cake carving for me when there is a need!), carved the spiral road. I covered the whole cake in chocolate frosting (it was a Boston Cream; our family's favorite) and returned it to the freezer again to firm up so the chocolate would be ready to take on the exterior buttercream & fondant.

The hardest part was making the road; I did it in 3 sections. I rolled out the black fondant and cut the inside curve with a pizza wheel, then laid it on the road and trimmed off the outside of the curve. That was the best way I could figure how to do it.

It was a really fun cake to do; it's always time-consuming but I really do enjoy it!

Aunt Jessie's Buttermilk Cake

An old time family favorite!

2 1/2 c sugar
1 c shortening
3 c flour
1 tsp baking powder
1 c buttermilk
1/4 tsp baking soda
1 tsp salt
1 1/2 tsp lemon extract
4 eggs


Preheat oven to 350 degrees. Prepare a bundt or angel food pan by greasing it with shortening, then dusting with powdered sugar.

Dissolve baking soda into buttermilk. Cream sugar & shortening. Add eggs and lemon extract; mix well. Add flour, baking powder, salt, and finally buttermilk/soda; mix until just well blended. Scrape batter into prepared pan; bake at 350 for 1 hr 15 minutes. It's done when the center of the cake springs back when you press on it.

If you halve this recipe it's just right for a regular loaf pan. Or, bake a full recipe in two loaf pans and give one of them to a friend!

I like to ice the top of mine with a simple lemon icing... just combine a couple tablespoons of lemon juice with enough powdered sugar to make a good drizzling consistency. In my family we adore eating this buttermilk cake with this frozen dessert!

Chocolate Cake with White Frosting

I made this cake for my Mom's birthday, and it was to serve a crowd of 15 (including small children). I wanted to be sure there was enough cake for everyone, without using two cake mixes. So I decided that I wanted my two 8" rounds to each be as tall as they could be. It worked! The cake rose more than usual and it turned out nice and tall, and it was enough for everyone at the party.

Chocolate Cake

1 box devil's food cake mix
1 box (small) chocolate instant pudding mix
1 1/4 c water
1/2 c oil
4 eggs, separated
1/8 tsp cream of tartar


Preheat oven to 350. Grease two 8" cake rounds with Pam Baking (you can use regular Pam too, or old fashioned grease n' flour... but Pam Baking is so fantastic; cakes never stick!). Mix cake mix, pudding mix, water, oil, and egg yolks with a hand mixer in a large bowl. Mix for about 2 minutes until it is well-combined. The mixture will be thick.

Beat egg whites & cream of tartar in a separate, smaller bowl until stiff peaks form. This won't take very long. (FYI, egg whites whip up better when they're at room temperature rather than cold. The cream of tartar acts as a stabilizer, helping the whipped whites to not collapse.)

Fold beaten egg whites into the cake batter. Once it's combined, pour into two 8" cake pans and bake at 350 for about 35 minutes, or until the center springs back when lightly touched.

Allow to cool in the pans for about 10 minutes, the invert onto a cooling rack to finish cooling.


Something interesting I noticed about the way the cake baked with this recipe is that the cakes rose more evenly during baking. Rather than having an obvious dome in the middle, the cake rose up the sides almost just as much. In fact, the dome was so small that I didn't even have to cut ANY of it off when assembling the cakes! I was delighted that it turned out so well.


White Frosting

I decided to give this frosting recipe a try. I'll just provide you with the link so you can read the directions for yourself; it's Pioneer Woman's "best frosting I've ever had." Yes, it was very good. In the pictures the texture looks just like buttercream, but it's quite different in real life. It's very light, and sort of melts in your mouth like whipped cream. However, it is much more sturdy than whipped cream; I put about 1/2" layer of this frosting between each of my four layers of chocolate cake, and it held up beautifully and didn't squish out or get smushed by the weight of the cake. It spread easily and tasted very good with the chocolate cake. I wouldn't use it for any time buttercream is called for, but I will definitely make it again to go on a chocolate cake or cupcakes.

The ingredients are strange... There's flour in it, but don't let that freak you out. It works! My only addition to the instructions given: be sure to sift your flour first. I had a few tiny lumps in mine and wish I'd taken the time to sift it first.

Cakes: Straight and Crumb-coated

Can you tell that I like to make cakes? That I like to talk about cakes? And that I like to make and talk about cakes probably more than I like to eat cakes? I honestly do cook much more "real" food than desserts; if you know my husband and/or children you'll see that they're all thin... which means I don't serve them cake and dessert at every meal.

But if any occasion comes up that could possibly warrant a cake, by golly I'll bake one!

Tomorrow is my mom's birthday; we all met for dinner at a restaurant tonight and I brought the cake:
I don't have a picture of the inside since it was cut at the restaurant by our server and I didn't have my camera on me. But it was four layers of chocolate cake with white frosting between each layer.

I'm not very good at roses and it had been several years since I'd done any, but it was fun to do some to put on this cake. Also I need some serious help with leaves. But it turned out okay.

So today I would like to tell you how to make a gorgeous, straight-sided cake, and how to make the frosting look nice.

Let's say you've baked two 8" rounds. Right before assembly time (which in my case means after the cakes have been baked, cooled, frozen overnight, thawed out, and unwrapped), slice part of the "dome" off the top. I always make sure my top layer is the prettiest "bottom" of one of the rounds, so that it makes a nice flat surface and square edges.

I always slice both of my rounds in half, so that I end up with four layers. Just use a long, thin, very sharp and preferably serrated knife to do this. Slice it as straight and evenly as you can, otherwise you'll end up having to match the cuts up perfectly so your cake isn't lopsided. For the bottom two layers, you can either put the round right-side-up or upside-down. For this cake, I put it right-side-up so that the nice flat bottom of the cake was on the bottom. I've done it both ways though. Then, my top cake was upside-down (matching up my slices) so, my two rounds were top-to-top; dome sides together.

When you spread your filling or frosting between each layer, make it nice and even... OR, make thicker on one side to account for any crookedness. Your BEST FRIEND when spreading frosting is an offset spatula. I don't know what I'd do without mine; a couple of times my kids have put it away in the wrong drawer and I've had a small heart attack when I've thought it was missing.

When you're frosting any cake, but especially when you're frosting a chocolate cake with white icing, you're going to be stressed out about the crumbs getting in the way & showing. It's a total nightmare when making choc w/ white.

The solution is so simple; I was so happy when I learned about this: do a crumb coat. This cake's crumb coat is shown below:

See? I just frosted it without abandon; not a care in the world for how many dark crumbs were contaminating my pretty frosting. A crumb coat is just a thin layer of frosting that seals in the crumbs. Just be sure to set aside enough "uncontaminated" frosting for the final layer! The crumb coat is also a good time to make the sides nice and straight, and to fill in all the ridges between layers of cake. This particular frosting had a lot of butter in it, which meant it set up nice and firm after leaving it in the fridge for a little while. After about 45 minutes in the fridge, the crumb coat was set firmly enough to apply the rest of the frosting to the cake.

Application of a crumb coat requires more frosting and more time/planning, but it will really help the prettiness of your cakes.


Next post: the recipe for this particular cake!

Strawberry Shortcake Flag Cake

Since I didn't really follow a "recipe" when making this cake, I just posted the picture w/o recipe instructions. I made it on Sunday (the 4th of July) and brought it to a dinner with some friends. It got rave reviews and I thought about posting a recipe for it, but then tonight when one of the friends told me that she was so full from eating so much of my cake that she couldn't eat anything until 1pm the next day, I thought, okay, I'm posting this! :)

As usual, I didn't do much measuring of anything... but I do remember what I did. So here goes:


1 box white cake mix, plus eggs & oil to prepare
8 oz brick cream cheese, softened
4 T (1/2 stick) butter, softened
up to 1/2 c milk
powdered sugar (you will need less than one 2 lb. bag)
about 50 blueberries
1 lb strawberries
2 T white sugar
1/3 c shortening
Cool whip (or whipped cream)


Prepare one regular white cake mix into a 9x13 pan. Once it has been out of the oven for about 10 minutes, carefully dump it out of the pan upsidedown onto a cooling rack. May I recommend Pam for Baking! It's even better than regular Pam; has a little flour in it and is especially for greasing cake pans.


Prepare your berries: Wash, hull, and thinly slice all strawberries. Take about half of them and put into a small mixing bowl. Mix 2 T sugar into them and set aside. We'll use those for the inside of the cake. For the remaining strawberry slices, spread them out on paper towels to absorb their moisture. These are the ones we'll put on top for the stripes. Rinse blueberries and set on paper towels too.


With a hand mixer, mix 8 oz softened cream cheese with 1/2 stick of softened butter. Add 1 tsp vanilla and a splash of milk (2-3 T). Once that's well-blended, add some powdered sugar until it's a good consistency for spreading. I would say 2-4 cups; just keep adding 1/2 cup at a time until you like the consistency.


Now we're going to split the cake. You'll need a very sharp, very long knife for this. I like to put the top side down on a 9x13 cake, so I put the whole (cooled) cake upside down on my serving board, the carefully cut off the top layer and move it (with both hands underneath for support and spreading out your fingers so it doesn't break!) to another surface.


Evenly spread about HALF of your cream cheese frosting on the inside of your cake (split layer). On top of the frosting, spoon your macerated strawberries (that means they've been soaking in their own juices & sugar and getting nice and juicy for you) evenly. Don't let the berries & juice go too close to the edges. Go ahead and spoon all the strawberry juice on there; it will only make the cake more yummy! Carefully place the other half of your split cake on top of the berries.


Now, you'll need some more frosting to cover the whole cake. Starting with your leftover cream cheese frosting, add about 1/3 c shortening and mix well. Add 1-2 T milk. Add some more powdered sugar (maybe 1-2 cups) until it's the consistency of a nice buttercream.


At this point I decided I wanted the frosting to be lighter... in color and in consistency. So I folded in about 1/3 to 1/2 a tub of Cool Whip to the buttercream/cream cheese frosting. After doing that, frost the entire outside of the cake.


Refrigerate for at least a couple of hours before serving, AND... shortly before serving, make your stars and stripes with your berries. I had drained my sliced strawberries on paper towels but they still bled by the time of the party; I'd put them on about two hours beforehand.


So there you have it! It was very yummy.

Waves Cake

For Noah's 10th birthday party, 2010. When I asked him what kind of cake he wanted, he said "yellow cake with blue frosting." Since he was having a swim party I decided to carry over the water theme.

I just split the two 8" rounds so that it was four layers total, with a thin layer of blue frosting between each. I just used store-bought vanilla frosting (two cans) and colored it with mostly blue and little bit of green food coloring. I made half a batch of marshmallow rolled fondant, and colored it roughly the same color as the frosting (a little darker). I rolled it out into a thin, long skinny rectangle and cut the bottom straight with a ruler (and a paring knife). I was going to make one long continuous waves wrapper for the outside of the cake but then I realized it was going to be a nightmare trying to deal with such a long thin piece of fondant, so I changed my plan and cut individual waves of different sizes and stuck them on the outside of the cake, overlapping.

To make the "hill" which is the wave on top of the cake, I used the two cut off domes from the tops of the two rounds (which I always cut off to make a nice flat top to my cakes) and I just sort of folded them in half and piled them up on half of the top of the cake. Then I microwaved some of the leftover canned frosting so that it was soft enough to sort of pour onto the crummy mess of a hill, to smear around and adhere it all together. Once that frosting had set, I rolled another piece of fondant to cover it. I actually kneaded together a piece of white and a piece of blue fondant to make it marbled, but you can't tell in this picture.

I sprinkled some water onto the flat part of the top of the cake so that the "sand" would stick to it -- Sugar in the Raw (my favorite fake sand for cakes). Before putting the sand down I peeled back the edge of the wave so it would look like the wave was washing up onto the sand. Going for realism, as always :) Just kidding.

I hoped to find an action figure of some sort that would fit into the theme; a dude in a swimsuit or something. I was very excited to find this surfing Phineas and Ferb toy at Target; my kids like that show so it was perfect.

In order to have frosting to pipe, I mixed some powdered sugar with the remaining store-bought frosting so that it was thick enough. It was light blue and I put a couple drops of blue food coloring in the frosting bag to make it come out swirly-colored. I actually made the frosting a little too thick and it was really hard to pipe; my hand got tired fast and I'm not very happy with the piping but I just had to get it finished for Noah's party -- there's no way I would've had time to remix the frosting to make it less thick. I like the way the waves on the sides look with the piping outline; it's just sloppier than I would normally do. Oh well!

Noah loved it; he said it was almost as good as his city cake from when he was 5 (seen on this post). Well, I don't know about that but I do know this one was MUCH faster to make!! That city cake was way more work. This one was fun though, and it was nice to tie in the swimming/water theme of the party.

Rainbow Cake

{Reposted... originally appears on my regular blog in April 2010}

For Molly's "rainbow party," the outside of the cake looked like this:

Before it was assembled the cakes looked like this (top two have been cooked and the bottom two are ready to go in the oven). I used these instructions, roughly making concentric circles... I just blobbed some batter in the middle, then each color on top of the last, jiggling the pan a little to help it settle. (If you click on that link, the lady gives some strange low-fat diet recipe; I just used regular white cake mix and followed the normal intructions.)
I just divided the batter into six small bowls and colored each with gel food coloring to make the six colors of the rainbow. This process made the cake less fluffy than usual, and after I'd baked two 8" rounds I knew I wanted it higher. So I used a second box of cake mix and baked two more 8" rounds. I split each round & put a thin layer of frosting between, so there ended up being 8 layers total. I used store-bought white frosting and the whole thing took 3 full cans of frosting. Also, the rainbow on top was made of m'n'ms, which I decided would taste better with cake than Skittles would.

I was just delighted when we cut into it; the colors inside were SO vibrant!
All the party guests ooh'ed and ahh'ed over it; here's a closeup of a single piece. I really like how it turned out.
Blog Widget by LinkWithin