Double Chocolate Mousse Pie

This is not a great picture, but I've included it anyway to give you an idea of the rich, creamy texture of this delicious chocolate pie.  I started by looking online for a chocolate pie recipe, and I found one... but it wasn't long before I could tell that it wasn't going to turn out anything close to what I wanted.  I made enough significant changes to the recipe that it's brand new.  I love the way it turned out.  This pie has four components, and takes a little doing and dirties a few dishes, but the result is so worth the effort.

Complete ingredients list:

1 9" or deep dish pie crust, baked
1 1/2 c + 1/4 c white sugar (to be used separately)
1/2 c cornstarch
1/2 tsp salt
3 c milk
1 c semisweet chocolate chips
2 oz unsweetened chocolate (two 1-oz squares, chopped)
4 eggs, separated - yolks in a small glass bowl, whites in a medium glass bowl
1 T vanilla extract
2 c (one pint) whipping cream
chocolate shavings for garnish, if desired.


Component #1:  Crust

Use a standard single pie crust recipe.  "Blind bake" it, which means bake it alone, unfilled, in the pie pan.  Use pie weights, or two layers of tin foil carefully pressed into the top of it so that it will keep its shape and not shink away from the sides as it bakes.  Remove the weights or foil for the last 6 or 7 minutes of baking, so the bottom has a chance to cook completely.

Component #2:  Chocolate "pudding"

Whisk together 1 1/2 c sugar, cornstarch, and salt in a 2-qt saucepan.  Stir in milk gradually.  Add both kinds of chocolate.  Place over medium heat, stirring constantly (for several minutes) until mixture thickens and boils.  Boil and stir for 1 minute (it will be quite thick).  Turn off the heat.

Temper the eggs yolks by adding a big spoonful of the chocolate mixture into them, whisking to combine.  Then, pour egg yolks/chocolate mixture back into the chocolate mixture (in saucepan).  Turn heat back on to medium and bring back up to a boil for 1 minute.  Remove from heat & stir in vanilla extract.

The chocolate "pudding" mixture needs to be cooled to room temperature before the next step, so allow a couple hours for cooling, or cool it over an ice bath.

Component #3:  Cream

Using a cold bowl and cold beaters, beat cream (entire pint) and 1/4 c sugar just until stiff peaks form.  Reserve about half the whipped cream to garnish the top of the pie later.  Carefully fold the cooled chocolate mixture into the other half of of the whipped cream.  Only fold/combine it part way, so that it is not completely incorporated.

Component #4:  Meringue for more volume

By this time, your 4 egg whites, which should be sitting in a separate bowl, will be room temperature (not cold).  This is better for whipping.  Using clean beaters, beat egg whites with a hand mixer until stiff peaks form.  Fold the beaten eggs whites into the partially combined chocolate & cream mixture.

Take care not to deflate your egg whites and your whipped cream when folding into the thick chocolate.  Once it's fairly well combined, the result should look (and taste) like a nice fluffy chocolate mousse!

Spoon entire mixture into your baked & well-cooled pie crust.  Spread reserved whipped cream over the top, and garnish with chocolate shavings if desired.  Chill for at least an hour or two before serving.  This makes a lot; you'll want to use a deep dish or definitely a 9" pie; not an 8", for this recipe.  I made the mistake of not photographing this pie when it was first cut into; it was very tall and fluffy.  Delicious!

Paper Bag Apple Pie

This recipe is from an old church cookbook, and it's a great little twist on traditional apple pie!


You'll need a regular brown paper grocery bag, plus the following ingredients:

1 9" unbaked pie shell
about 7 cups peeled & sliced apples (for a deep dish pie I use about 10 small apples)
2 T lemon juice
3 T flour
1/4 tsp nutmeg
1/2 tsp cinnamon
1/4 c sugar (I always include this because I use tart apples to make pie; if your apples are sweeter you won't need as much sugar)

Topping:
3/4 c sugar
3/4 c flour
3/4 c butter (1 1/2 sticks), softened

Combine apple slices in a large bowl, with lemon juice, flour, nutmeg, cinnamon, & 1/4 c sugar.  Toss to coat evenly.  Put into pie shell.  Combine topping ingredients, which makes almost like a sugar cookie or a shortbread dough, and spread/pat it evenly over the top of the apples. 

Slide pie carefully into a brown paper bag, on top of a large cookie sheet.  I always make sure to invert the side folds of the bag so they're poking OUT, so that the paper doesn't absorb the butter from the topping & crust.  Fold the end and secure with paper clips or staples.  Bake at 425* for 1 hour.

Using a paper bag allows the pie to bake evenly and it turns out just right every time!  Also, one little note: I have made this pie probably 10 times and I've never had the paper catch fire in the oven.  It often gives off a burnt paper odor as it's cooking, but it's never a very strong smell and it's only for the first little while of cooking time.

Give this recipe a try; the cookie-like topping on the pie and the paper bag technique make it a winner!

Blueberry "syrup"

This morning, two things converged to become a lovely meal.  Number one: now that the kids are in school and I'm often at home by myself, I sometimes have a hankering for a delicious brunch-for-one.  Number two: I like blueberries, and since they've been on sale lately I keep buying them up to snack on.  After recently reading this paragraph from an article about blueberries, I'm especially sold on the awesomeness of them: Overweight rats fed the human equivalent of 1 cup of blueberries a day stored less belly fat than those that didn’t eat them, reports a University of Michigan study. The researchers believe compounds in anthocyanin, the pigment that gives blueberries their tint, may turn on genes related to fat burning.

Interesting, huh?  So -- I decided today to make Dutch Baby, and to incorporate blueberries in the form of a syrup.  YUM!

Here's how I made the syrup:

Rinse one container (one cup) of blueberries, put into a small saucepan.  Add about 3T sugar, about 1/8 tsp cinnamon, and stir til it's basically combined.  No need to add water!

Turn the burner on medium-high, stirring occasionally, until it starts to get bubbly.  As the blueberries cook, they'll break down and release their juices, and the syrup will soon start to look a little more syrup-y instead of a pan full of dry berries.

Simmer, uncovered, on medium-low heat for about 15 minutes, stirring occasionally. Remove from heat and add 1/2 tsp vanilla. Allow to sit for 5 minutes before serving.


 The final result was about 2/3 c of a chunky sauce, more like a berry compote.  I went ahead and used all of it on my Dutch Baby, but half would've been enough.  I just figured, I was planning on eating that whole container of blueberries today anyway, so might as well!  It was yummy.
 Maybe it's weird that I'm posting a picture of the plate after I ate, but it's to show the very pretty color of the syrup against the white plate.  Cooked blueberries make the best color ever.
Enjoy!  (I know I did!)

Space Cake

This was a really fun project!  I spent quite a bit of time on it and took pictures of some of my trial & error of the planets.  The cake itself was pretty straightforward.  The birthday boy (not my son; a friend's son) wanted chocolate (and, he wanted the cake to be space-themed).  So, since the cake was supposed to feed a crowd of 50-60 people, I used five Devil's Food cake mixes.

One standard cake mix fits perfectly into a half-sheet pan, so I baked four of those and the fifth cake mix was for the sun.  The final product was quite heavy: about 22 pounds.  It needed a strong base; so I cut up a large cardboard box and hot-glued three layers of regular corrugated cardboard together (and then hotglued foil over the whole thing).  Three layers thick of cardboard ended being just right for this cake.

Most of my cake layers didn't break when I transferred them, but of course the one I took pictures of was the broken one :)  Since I think it helps cakes to be moist, I usually bake-ahead-and-freeze them, but there wasn't room in my freezer for these.  So, to ensure that they were nice and moist I brushed each layer with a simple syrup: just water & sugar brought to a boil, and I added a little vanilla to it before brushing it on.

Following the simple syrup I covered each layer with a full can of store-bought vanilla frosting.
I used canned frosting between each layer, but I made my own buttercream to cover the entire cake (four layers) in a thick crumb coat.  I used part butter and part shortening for a nice flavor and consistency.  After the frosting had had a chance to dry out & set up, I patted it nice and smooth all over with a paper towel so that it would be a smooth finish for the ganache, later.
Once the cake was coated (the whole thing; I just hadn't finished the sides when I snapped the photo above), it was time to figure out how to make the planets.  I looked online for ideas but ultimately only had success with lots of my own trial and error.  I'd planned on making the smaller planets out of balls of rolled fondant, but for the bigger ones (Jupiter & Saturn) I wanted them to be hollow so that they'd be light enough to stand up on a sucker stick above the surface of the cake.

So... how would you make hollow, edible planets???

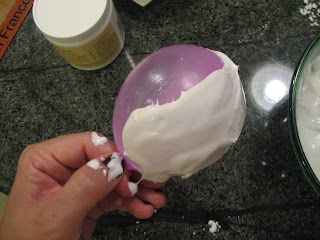
I mixed up a batch of royal icing and tried covering a greased balloon with it, with the idea that I could let it harden and then pop the balloon.  Well, this was a small, thin, flimsy water balloon and it popped under the weight of the royal icing just a few seconds after I took this picture.  Maybe a more sturdy balloon would've worked.  But I just gave up on that idea.
Then I thought, I'll make two half-spheres and stick them together.  I decided that a tennis ball was a good size, so I made a half-sphere mold out with a tennis ball and greased foil.
 And, I tried the "inverted" version.  Neither of these worked.  Even letting them harden overnight, and doing several of them with different thicknesses of royal icing, either they didn't harden completely, or they were too crumbly and delicate.
 So how about melted sugar?  The standard recipe for homemade hard candy is 2 parts granulated sugar to 1 part light corn syrup, cooked until hard crack temperature.  First I tried using the inverted (bowl-shaped) foil molds, and drizzling melted sugar back & forth to create sort of a nest.  I've seen this done on TV so I thought it would work :)  Well, it wasn't a bad idea but the results all broke -- too delicate.  And, definitely too delicate to cover with fondant, as was my plan.
Then I tried covering the tennis ball with waxed paper and spooning a thicker layer of sugar onto it.  The results were better: a sturdier half-sphere, BUT the waxed paper stuck to it (which meant it would not be 100% edible).
 Finally!  The solution!!  Greased foil wrapped around a tennis ball: I spooned the melted sugar (which was over-cooked by this time, hence the amber color) over the greased foil, and after it hardened (which only took a couple minutes) it was easy to squeeze the tennis ball out of there.  And, the foil peeled off quite nicely.  Hooray!!  The sugar was thicker so it would be strong enough, so it was heavier than I really wanted but it was nice and sturdy.  In the background of this picture below you can see Saturn's ring, which I made by drawing a circle onto a piece of paper and putting it underneath my Silpat, then spooning melted sugar onto the Silpat using the circle as a guide, and then quickly running a toothpick that had been dipped in food coloring through it to give it a marbled color.
Using more melted sugar I glued two halves together to make a circle, and for Saturn I adhered toothpicks (with more melted sugar to make them nice and strong) on either side to later support its ring (after I covered Saturn with fondant, I glued the ring to the toothpicks using - you guessed it - melted sugar).

 For the smaller planets, I'd planned to make balls of fondant, but my fondant was too fresh and not firm enough to hold a good shape.  So, I used suckers for the form and covered them with fondant.  The smallest planets (Mercury & Pluto) were dum dums, and the medium-sized planets were Tootsie-Pops.  Once I covered them in fondant I stuck their sticks into a piece of floral foam so their surface could dry out a little before I painted them.

Painting them was the most fun part of the whole thing!  I decided this method would be easier to get the colors I wanted, rather than mixing up several colors of fondant.  I used mostly food coloring gels, thinned out with a little water.
 I made the sun the same way as when I made Noah's basketball cake, a few years ago: baked 3 small rounds, stacked them, and had my husband carve them into a half-sphere for me.  I didn't take any pictures of the creation of the sun, but it's just chocolate cake with vanilla frosting between the layers, crumb coated all over, and I put it in the fridge to firm it up for a while before it was time to put it on the cake.

Oh, and as you can see, the cake is covered all over with chocolate ganache (chocolate+cream).  I wanted the backdrop to be dark, without having to make something like black fondant.  Ick.  This was much better and I think it was dark enough for the "space" effect.  A little ganache goes a long way, as it's quite runny (I made WAY too much of it) -- but I knew it would be viscous enough to flawlessly cover the white frosting underneath it.

Once the ganache was on and had firmed up a bit, I put the sun on, and frosted it with yellow buttercream that I'd made to a pretty thick consistency so that I'd be able to make it all spiky-looking.  I added some dabs of orange food coloring gel to try to make it look more sunny.

Since most of the planets were on suckers and therefore already on sucker sticks, I hot-glued longer sucker sticks to the ones that I wanted to stand up higher.  Jupiter & Saturn proved too heavy to be more than barely above the surface.  I rolled out some yellow fondant for the stars and painted the letters on them with food coloring gel.
 This was a really fun cake and it turned out pretty similar to the sketch I'd drawn out ahead of time.  I heard that the birthday boy loved it (I wasn't able to be there to see his reaction) and I heard that it tasted good, too :)


Cinnamon-Sugar Chex Mix

A few months ago, all Chex cereals were heavily marked down at my local grocery store so I bought several of them.  Turns out, my kids don't love Chex when eaten as a cereal.  So, when I needed to make a treat to bring in to my son's classroom today I thought of making a Chex mix and I came up with the following recipe which turned out delicious!  And, it uses up some of our extensive Chex supply!

Cinnamon-Sugar Chex Mix

3 cups Rice Chex
3 cups Corn Chex
1 package microwave popcorn, popped
2-3 c mini pretzels or pretzel sticks
1 c white chocolate chips
(nuts - optional.  I didn't add any to this because one of my son's classmates has a peanut allergy)
1/2 c butter (one stick)
1/2 c sugar
1 tsp cinnamon


Mix cinnamon & sugar together, set aside.  Melt butter in a small bowl.  In a large, microwave-safe bowl, mix both kinds of Chex, popcorn, pretzels, and white chocolate chips.  Stir to combine.  Drizzle with butter (all of it) and stir until it's evenly coated.  Microwave 1 minute; then stir.  The white chocolate chips will melt and help to coat the other ingredients and give it a nice layer of sweetness!  Microwave another minute.  Stir.  Sprinkle half the cinnamon/sugar mixture and stir it around; microwave 1 minute.  Sprinkle the rest of the cinnamon/sugar mixture and stir it around; microwave 1 minute.  Stir.  Microwave 1 minute.  Stir.  Microwave 1 minute.  Stir.  Spread out on waxed paper to cool; store in an air-tight container.  This will fill up a gallon-sized Ziploc bag.

Molten Lava Cakes

This is one of my favorite recipes! These are so delicious! I first got the recipe from RealMomKitchen, who had found it on OurBestBites. My latest batch (pictured) were just slightly overcooked so the "molten lava" filling wasn't as molten as usual; I just left them in the oven a minute or two long. But, you can still get the idea and they were still delicious! My little trick is that I make a 1/3 batch, which makes two muffins' worth, when it's just for my husband and I. Or... just for me :) Enjoy!

Molten Lava Cakes

4 T real butter
1/3 c sugar
3 large eggs
1/3 c flour
1/4 tsp salt
8 oz bittersweet chocolate, melted (8 oz is about 1 1/3 c bittersweet chocolate chips. I usually use semi sweet and it's still delicious!)

Additional ingredients:

powdered sugar for dusting
whipped cream for serving (or vanilla ice cream)

I always bake these in muffin tins (recipe will make 6) but you can make slightly bigger servings by baking them in 4 ramekins.

Directions:

Preheat oven to 400 degrees. To prepare pans, use your fingers (or the butter wrapper) to rub butter in the muffin tins or ramekins. Sprinkle in some granulated sugar to coat the entire inner surface and tap out any extra and discard.

In a bowl with a mixer beat butter and sugar until fluffy. Add eggs one at a time, beating well after each addition. Combine flour and salt and slowly add it into the butter mixture just until combined. Stir in melted chocolate by hand, just until combined. Don’t over mix.

Divide batter evenly among prepared muffin cups or ramekins and then place them on a baking sheet. Bake just until tops of cakes no longer jiggle when pan is lightly shaken, about 8-10 min for a muffin pan, and 10-12 for ramekins. Remove from oven and let stand 10 min. If using muffin tins, invert the tin and place an individual cake on each serving plate. You can do the same with the ramekins, or just serve them as is. Dust with powdered sugar and serve with a dollop of sweetened whipped cream (or ice cream).


These are rich and delicious; a real treat! And, made with "normal" ingredients so they can be whipped up any time and not just for special occasions.

Pen Pal!

I love to get "reader emails" although that is a rare event. Well, back in early December I received an email from a reader in Malaysia, named Deepa. How fun! She had been researching spiral cakes and came across this post, my nephew Crew's 2nd birthday Cars cake. The existing instructions on carving the spiral weren't clear (and it didn't help that I hadn't taken any pictures during the carving process) so I prepared this little diagram and emailed it back to her:


About a week later she sent me pictures of the cake she made for her godson. Just look at how CUTE that turned out! Her work is SO good and clean and she even made the cars out of fondant! She told me that she had only covered plain round cakes with fondant twice before she'd made this one. She's a natural with fondant!

We exchanged many more emails over the course of several weeks; she shared with me her recipe for from-scratch cake that she uses that is strong enough to support the weight of fondant, and I learned that cake mixes are very expensive in Malaysia because they're imported, so nobody uses them. Deepa sounds lovely and is a young mother of 3 who finds cake decorating to be therapeutic. I understand that completely!


I had such fun writing back and forth with a new friend; I know the internet has been around for a long time now but I still marvel at how it seems to make the world so much smaller.

Zoe & Lucy's 8th birthday cakes

Zoe and Lucy had their birthday party at a fun party place (Amazing Jake's) so there really wasn't a "theme" for me to go by for the cake. The night before, I laid in bed thinking about it and this is roughly what I came up with; I wanted them to be brightly colored and reflect a "fun" mood just like their party would be.


I made plenty of this fondant and colored it in several colors; the bottom layer of the cakes are 8", then 6", then the top little cakes I baked in my 5" rounds but trimmed them down to about 3 1/2". It had been a while since I covered a cake in fondant and it was a lot of fun to make these.

New favorite sugar cookie recipe!

My mom & sisters & I got together to decorate sugar cookies last week; we used a recipe that my mom had gotten from her friend and it's just fantastic! Makes a nice, tender dough and doesn't need chilling before rolling out. One batch will make at least 2 dozen cookies.


Ingredients:

1 c sugar
1/2 c sour cream
1 egg
1 tsp vanilla
1/2 c butter (softened)
3 1/4 c flour (plus more on hand for rolling out dough)
1 tsp salt
1 tsp baking soda
1 tsp cream of tartar


Preheat oven to 350. Cream together first five ingredients. Sift flour with salt, soda, & cream of tartar in a separate bowl; then add gradually to the wet ingredients. Mix thoroughly.

Flour a flat surface and flour your rolling pin; have extra flour on hand. Using 1/4 to 1/2 the dough at a time, knead a few times with flour until it is less sticky and easier to work with. Then roll it, with plenty of flour, out to about 1/4" thickness and cut with cookie cutters.

Bake at 350 for 5-10 minutes. I found that my cookies were done at about 8 minutes; your oven may be different. Cookies will be soft and tender; delicious! But even better with frosting :)

A great Piping idea!

How many of you hate to clean out your frosting bags when you're done with a project? Or even worse is having to refill them with frosting mid-project and have a goopy mess on your hands? Well I learned a new trick last week from my mom that makes life SO much easier when you're piping!


First lay out a square of plastic wrap, and put a blob of icing in the middle of it (this was pretty runny icing that I was using for sugar cookies). Next, fold one side of the plastic over the icing and roll it up like a tootsie roll. Snip off the extra plastic on one end with scissors, and twist the other end. Prepare your frosting bag as you normally would (coupler, tip, etc) and then just put your plastic-wrapped icing right in! Put the cut side in and the twisted side out, and then just twist and squeeze your frosting bag as usual. If your icing runs out before the job is done; no problem! Just remove the whole plastic tootsie roll thing from your frosting bag and make a new one. Your frosting bag stays totally clean except for the the very tip, and it's so much easier to deal with.


Thanks for the great tip, Mom!

How-to: Lattice Top Pie Crust


I love making lattice-top crusts on pies; it's not very hard and it definitely makes a good impression! The last time I did this (Thanksgiving) I took step-by-step pictures; hopefully this will help if you've even wanted to do this but been unsure how.


Start by rolling out your pie crust; it doesn't have to be pretty. I prefer to cut mine with my fluted pastry wheel (seen right off to the side in this shot below). You can just as easily use a paring knife. If you're a perfectionist, use a ruler to make nice straight lines... this wasn't a particularly pretty batch for me. The reason I didn't just cut straight lines all the way across my crust is because I rolled this out quite a bit bigger than the diameter of my pie, so I knew I wouldn't need such long strips. I start with shorter pieces and lay one on top and one on the side, like this (this was a creamy pear pie... most of the time your covered pies won't be so liquidy!) Time to start weaving! Add another slightly-longer strip across the top, below the first one, and another one next to the side one. Each time you add a new piece, look to see where it's supposed to go under or over each perpendicular strip... taking turns every other one. So, this new piece I'm laying here needs to go OVER the bottom horizontal piece, but UNDER the one above it. So, no big deal; I just lifted that horizontal piece up with my other hand, and held it up while putting the vertical piece in place. Then, lay it gently back down. Here, I've lifted up a vertical piece in order to lay the bottom horizontal one underneath it.And right after that, the horizontal piece is in place and ready for the vertical piece to be replaced across it.
Voila! Just keep going like that until the whole pie is covered! Horizontal, vertical, horizontal, vertical. Now, for this pie I chose to lay the pieces pretty close together. For a nice red berry pie I like to have some of the pretty color showing through, so I would leave more space between the lattice strips. With this creamy pear pie being so liquidy, I didn't want all that liquid to have much chance to escape. Once the pie is covered, trim around the outside of the pie plate with a paring knife, leaving about 3/4" hanging over. Going around the circumference of the pie, roll & tuck in the crust inward so that the edges are sealed shut and so that it looks nice and even. You can even make a pretty edge if you want, but I think with a fancy lattice top it doesn't need pretty edges.


For this pie I brushed it with melted butter and sprinkled it with cinnamon & sugar before baking it. And look how nice it turns out.
Here's an apple-blackberry pie I made a few months ago, using the same type of crust. You can see the lattice better on this one since I spaced out the strips better. This pie was brushed with butter and sprinkled with plain sugar before baking.
So there you go; happy pie-making!

Creamy Pear Pie

This recipe was recently featured on Our Best Bites and I couldn't wait to try it. I made it for a "pie party" we attended over the weekend and it was a big hit. It's peary delicious! The sweetness is just right; it tastes great plain without any whipped cream or ice cream... although, I wouldn't turn this pie down if it was heated up with some vanilla ice cream on top!


Ingredients:


1 double pie crust
About 1 1/2 lb firm (not too ripe, not too green) pears, peeled and sliced
(I used about 5 Bartletts)
1 T all-purpose flour
1 14-oz can sweetened condensed milk
3 oz cream cheese
2 T milk
1 tsp cinnamon
1/2 tsp ginger
2 T butter, melted
sugar & cinnamon for sprinkling

Instructions:

Preheat oven to 450. Roll the bottom of the pie crust into the pie plate.

Toss the sliced pears in the flour. Arrange them evenly over the pie crust in the pie plate. Set aside.

In a blender, combine the sweetened condensed milk, cream cheese, milk, cinnamon, and ginger. Blend until smooth. Pour evenly over the pear mixture. Use the remaining crust to form the top of the pie (I liek doing a lattice top). Brush with melted butter, and sprinkle with sugar & cinnamon.

Bake at 450 for 15 minutes, then reduce heat to 350 and bake for another 30 minutes, or until the crust is golden brown and the creamy mixture had thickened. Remove from oven and cool to room temperature.


I love doing lattice-top crusts on pies and soon I'll have a tutorial on here! So fun and really not as difficult as you might think. Guess what else is not that difficult? Homemade pie crusts! I've tried a few recipes for crusts over the years and they always taste better than store-bought. For this pie I used Our Best Bites' favorite crust recipe and it was lovely:


1 1/4 c flour
1/2 tsp salt
1/3 + 1 T shortening (I used butter flavored)
3-4 T ice water

Combine flour & salt; cut in shortening with a pastry blender. Add ice water gradually and, with your fingers, gently turn over the dough until all the water is incorporated and it forms a ball. Be sure not to over-mix or over-work the dough. Wrap in plastic and refrigerate until using. This makes a single pie crust, so you'll need to double this recipe for a double-crust pie.

A few thoughts.

Hi! Yes, it's been quite a while since I posted anything. I *have* been cooking... I don't take enough pictures though and then I don't feel like I have anything to post, when there's not a photo to go with it.

But here are a couple of things I've been thankful for lately, in my kitchen:

New garbage can. I picked one up at Costco not long ago, it is similar to this one but a little different. It was $50; it's stainless steel with a black lid, and battery-operated.... the lid goes up when you gently kick the pedal at the bottom, and then after about 5 seconds the lid goes back down smoothly on its own. We love it!! It looks nice, it works great, having it be hands-free-but-with-a-lid is fantastic, and the dog can't ever get into the trash (which is a big deal -- I can trust her a lot more around here now).

On Saturday I single-handedly turned 280 apples into 34 quarts of applesauce. I do this once a year, and every year I think to myself, "This is a HUGE pain and not cheap either; why do I do this? I'm NOT doing it next year!" but then the next fall I end up buying apples and doing it again anyway! I make my applesauce with nothing added: no sugar, cinnamon, etc, and I make it smooth/fine like store-bought applesauce. We love it and the kids just inhale it. And secretly, I kind of like canning :)

I have always used a labor-intensive system for milling the cooked apples, such as one of these. BUT -- I got a Cuisinart last Christmas and I decided to give it a try for my applesauce this year. HALLELUJAH!! Wow -- my Cuisinart blends up a big pot of cooked apples in a manner of mere seconds, while my hand-crank food mill used to take... oh I don't know how long, but just ages! Plus, with a food mill I was left with a thick fibrous pulp that I would just end up throwing away. With my food processor, every bit of the cooked (peeled/cored) apples goes into the applesauce. What a dream come true! I found that even though I was still on my feet making applesauce for probably 10 hours on Saturday, my thoughts of "I'm never doing this again!" were much less strong since I had my handy Cuisinart to work with. And, the parts can all go in the dishwasher = super easy clean up!

One final note. My four children are ages 7-11. Lately, they have all been pretty good about eating their dinner - regardless of what it is. Their palates have definitely become less picky. I attribute this partially to the fact that I have never given my kids a choice of what to have for dinner. If it's something strange that they don't think they'll like (or that they truly dislike), I have always still made them eat at least SOME of it. We have suffered through plenty of long, drawn-out nights at the dinner table where one or more stubborn child has to stay in their chair until they have eaten the measly two or three bites I've told them to eat. We've had our share of our kids throwing tantrums, gagging (real and completely fake), pleading, attempts at negotiation, etc. But by and large we have stuck to our guns and our children have as a result been exposed to a variety of foods. I do not understand why some parents have the standing policy that a PB&J sandwich is always an option if the child doesn't like the dinner that is served. In some instances I can understand (like if you're with guests and don't want to create a scene), but not on a regular every-day type of night. If you have young children, hang in there! Keep feeding them a good variety of foods for dinner, and I promise you that some day soon they will stop fighting you about it and there will come a time when they actually start to appreciate your cooking! Now, I'm not saying that my children never complain about dinner. But they have gotten so much better about it, and most nights I actually hear a few unprompted thank-you's, even from my 11-yr-old son!

{off my soapbox now...}

Web Searches

From time to time I check on my StatCounter to see who's reading my blogs. On my family blog, I have web searching disabled. But for this blog, I love looking at the searches that led people here. Overwhelmingly, the CAKES take the cake (ha ha). Who knows whether any of these random strangers around the world actually use any of my ideas, but here are several of the recent web searches that have led people HERE:

galaxy pegasis
tangled cake tutorial
beyblade shiny
how glue cookie crumbs fondant sand
tangled fondant cakes
868 icing tip swirl
clouds route 66
beyblade cake
galaxy pegasis 3D wallpaper (??)
galaxy pegasis drawing
rapunzel tower cake
making a cake instructions in pictures
bayblade cakes
spiral cakes
tangled cake
slushie swirls
beyblade galaxy pegasis stickers
beyblade cake pictures
tangled cake pan
bey blake cakes
beyblade cake pattern
beyblade cake ideas
nicest looking slushie (?)
how to make fondant beyblade
rainbow cake with skittles
how to draw beyblade
fondant tangled cake
fluffy sugar cookie recipes
9th birthday cakes for girls
website to how to draw galaxy pegasis
pictures of DQ cakes cars theme

That's just in the past week, and there were several more duplicate searches for Beyblade cakes and Tangled cakes. Who knew that when I made that Beyblade cake (when I'd never heard of Beyblade) that it was SO cutting edge.

Also, just for fun, here are the states & countries who've visited this blog in the past week:

Arizona
Utah
Switzerland
French Polynesia
Indiana
Pennsylvania
North Carolina
Australia
Germany
Florida
New Zealand
California
Canada
Italy
UK
Brazil
Maryland
Missouri
Texas
Colombia
Michigan
New York
Georgia (the state)
Tennessee
Oman
Kentucky
Connecticut
Mexico


All these strangers visiting is the reason why I don't have any personal information on this blog, not even a link to my blogger profile which would lead people to my personal blog. Anyway, it's interesting to me though how many people all over the world want to make fun cakes!

Pencil Cake

The first day of school is tomorrow, and we celebrated today with a big fun swim party for all the cousins at my parents' house. My mom asked me to make a pencil cake for the occasion; how fun! She found a couple of ideas online. I followed these instructions, and when you're starting with frozen Sara Lee pound cake it really couldn't have been easier! The pencil cake in the photos looks SO much nicer than mine; oh well.

A couple of notes: next time I would use a Hershey's Kiss for the tip, rather than melted/molded chocolate that turns out to be the same basic shape. Also, I used fondant for the greenish band joining eraser & pencil, since I had fondant on hand. After I'd put it on, I brushed the fondant with some iridescent powder to give it a little shimmer.

This was a fun little project and I would do it again!

Beyblade Cake

For a church fundraiser in June I auctioned off the service of making one custom birthday cake. The winner of the cake happened to be my across-the-street neighbor, and they "collected" on their winnings this weekend with their 9-yr-old son's birthday. At first (a month ago) I was told he wanted a football cake. But then a few days later he'd changed his mind, and wanted his party to be all about Beyblades. Well, I had NEVER heard of that! So I figured I'd better learn pretty quick!


Not being my own child's birthday cake, I wasn't as excited about this project as I usually am, but once I got into it, it was still a lot of fun to make. I made two 10" rounds (chocolate cake) and split them with chocolate frosting between each layer. FYI, one full cake mix fits perfectly into a 10" round. After the crumb coat I carved the "fins" to make it look a little more like the shape of a Beyblade (which is basically a fancy top). The thin parts weren't very sturdy but after another coat of frosting, and holding them steady with toothpicks in the fridge overnight, they ended up being okay with the weight of the fondant.


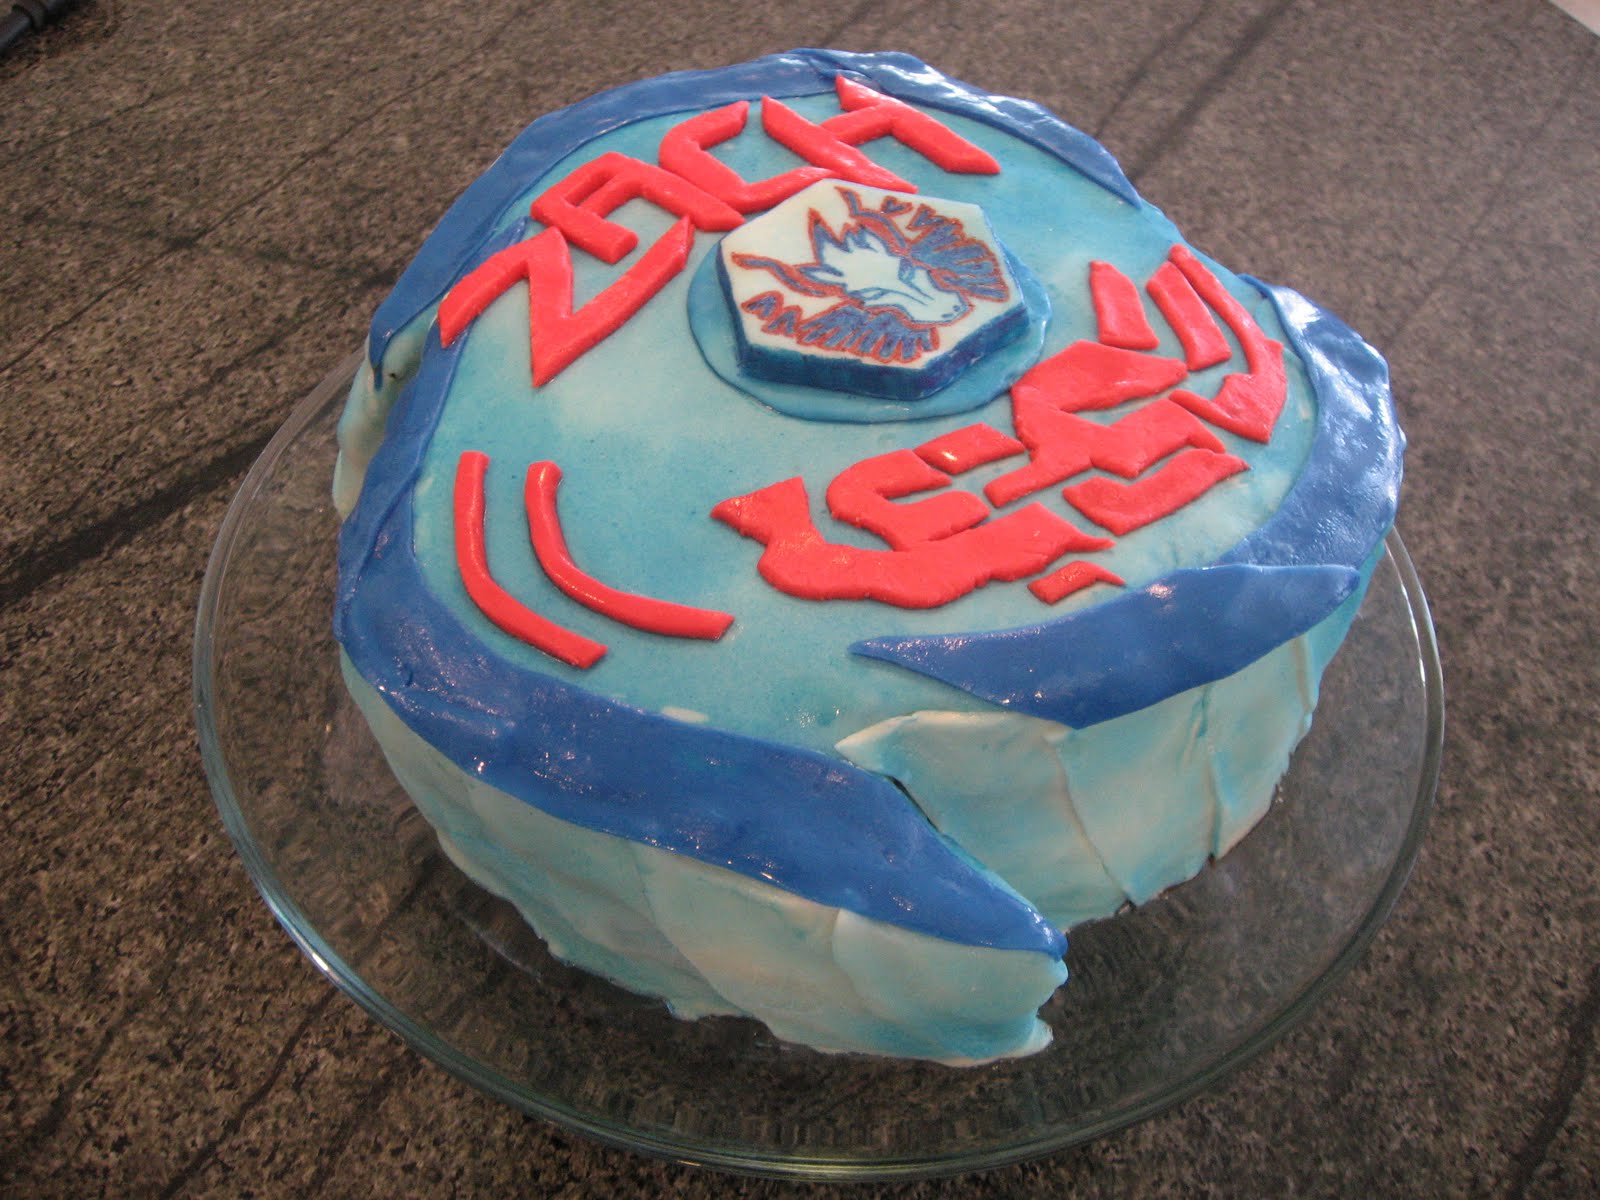
I used a couple of products for the first time with this cake: food color spray (like edible spraypaint; widely available) and edible markers. Both worked great! I covered the top first in white marshmallow fondant and then sprayed it blue. I also covered the sides (in angular strips) in white fondant and sprayed the sides blue, too. I used blue and red fondant for the accents -- my friend Danika had just made a Lego cake for her son and she brought her leftover, brightly-colored fondant for me to use and it was perfect for this!
For the red letters & design, I cut the shapes out of the red fondant and then let them dry out (laying on a Silpat mat so they wouldn't stick) for a few hours so that I could transfer them to the cake when they were more stiff not so pliable, so that they wouldn't lose their shape when transferred.

I drew this "Galaxy Pegasis" (Zach's favorite Beyblade) with the edible markers, which I bought at Michael's. I had cut this thick hexagon (using a paper template) from the white fondant, sprayed it lightly with the blue spray, and let it "dry" for a several hours before attempting to draw on it with the markers. The surface had firmed up some by then but I still had to be very careful not to apply too much pressure as it was still a bit squishy.


Here is what an actual Galaxy Pegasis Beyblade looks like; I printed this out as a guide and I also had borrowed the birthday boy's toy for reference. (Don't be too critical; I know it doesn't look much like it but I do think the Pegasis turned out pretty well.)
It was a fun challenge, and I'm excited to now have colored spray and food markers added to my repertoire of cake-making tools.


P.S. A couple of fondant tips: when you're ready to roll it out, sprinkle plenty of powdered sugar onto your counter and rolling pin. If it's still too sticky, knead more powdered sugar into it. This is for marshmallow fondant; it's been so long since I've used "regular" fondant that I don't recall whether it gets too sticky or not. Also, keep a cup of water with a small paintbrush handy (like a child's watercolor paintbrush). Brush water onto the back of pieces of fondant that you're going to stick on to the cake. Two layers of fondant with water between them will stick together permanently! Also, use the water to brush off any residual powdered sugar on the exposed surface. Or just brush some water on there to make it more shiny!


P.P.S. I still don't know much about Beyblades but FYI, they spell it "Pegasis," and not "Pegasus," as is the traditional winged-horse spelling.

Easy Orange Rolls

I wanted a touch of sweetness with dinner the other night, and I had Rhodes rolls on hand so I looked online to find an orange rolls recipe using frozen Rhodes rolls. They were delicious! The recipe calls for 12 but I made 15, and I just increased the other ingredients by a little bit.


Jenna's Orange Rolls

12 Rhodes Dinner Rolls, thawed but still cold
1 medium orange rind, grated
1/2 c sugar
1/4 c butter, melted

Citrus Glaze:

1 c powdered sugar
1 T butter, melted
3 T orange juice
1/2 tsp vanilla

Mix grated orange rind with sugar. Roll each roll into a 9" rope. Tie in a loose knot. Roll each knot in melted butter and then in rind/sugar mixture. Place on a large sprayed baking sheet. Cover with sprayed plastic wrap and let double in size. Remove wrap. Bake at 350 for 15-20 minutes. Remove from pan and place on cooling rack. Brush with citrus glaze while still warm.


Here's a little rolls tip for us warm-weather folks: last week I needed to make 48 rolls for another family and I didn't have time to make them from scratch so I went with Rhodes. But then I realized I was still short on time for them to thaw & rise. Molly, my 9-yr-old, had a great idea, "Mom, why don't you put them outside where it's really warm?" Perfect! I put them on greased (sprayed w/ Pam) sheet pans, and covered them tight with plastic wrap that I'd also sprayed. I set them out in the sun, on a nice flat spot where the dog couldn't reach them, and in just over an hour of being in 100+ degree heat they had thawed and risen and were ready to bake!


Special Occasion Cupcakes

I bought a TON of cake mixes when they were on sale at the grocery store last month, so now whenever I'm tasked with bringing a dessert to a group function, I wonder what I can make that requires a cake mix in its preparation. For my piano recital this week I decided to make cupcakes, but a fancier-than-usual version. I found this recipe on allrecipes.com; and I topped them with a sour cream chocolate frosting that I adapted from another allrecipes.com recipe. The result was delicious.


Self-filled Cupcakes

1 chocolate or devil's food cake mix, plus ingredients to prepare it (eggs, oil, water)
8 oz cream cheese (1 brick), softened
1/2 c white sugar
1 egg
1 c semisweet chocolate chips

Prepare 24-30 cupcake tins with papers (I did 30); preheat oven as directed on cake mix instructions. Mix up cake mix ingredients according to box directions and set aside. In a smaller bowl, cream the cream cheese with the sugar. Then add egg and blend well. Stir in chocolate chips.

Fill each cupcake tin 1/2 full of chocolate batter, then top with about 1 T of the cream cheese mixture. You should still have some of the chocolate cake mix left; spoon a little bit on top of the cream cheese mixture on each cupcake. Don't stir it around or marble it; just allow the cream cheese mixture to stay in its own little glob.

Bake according to box directions.

They'll look something like this:
I didn't have quite enough chocolate batter to top each cupcake with an additional spoonful but I wish I had. The ones without it (like at the bottom left of the photo above) sunk down in the middle ~ which just had to be compensated for with extra frosting.


Sour Cream Chocolate Frosting

1 c semisweet chocolate chips
1/2 stick (4 T) butter
1 T cocoa (unsweetened powder)
1/4 tsp salt
2/3 c sour cream
2 T cream
1/2 tsp vanilla
about 4 c powdered sugar

In a medium-large microwave-proof bowl, melt the chocolate chips, butter, cocoa, and salt together. Heat in 15-20 second intervals, stirring in between. It only took about a minute total for my microwave to melt it completely. Allow this mixture to cool for about 15 minutes; then beat in the sour cream, cream, and vanilla. Beat in the powdered sugar about a cup at a time. Add more or less than 4 cups depending on desired thickness.

This frosting has a nice tang to it due to the sour cream, and it's just the right amount of chocolatey-ness. It was plenty for frosting my 30 cupcakes. This frosting would also be great on a sheet cake or brownies.
Each cupcake had a moist, yummy surprise with the cream cheese and chocolate chips inside! I will definitely make these again sometime.


Next time, I'll be better prepared with some pretty cupcake baking papers. Like these. Are those the cutest or what!
Blog Widget by LinkWithin